A narrow hallway can feel welcoming or cramped, depending on how its light meets the walls. The right sconce should brighten the walking path without jutting into shoulders, bags, or passing doors. So, What type of sconce is best for a narrow hallway? In many homes, a slim, low-profile fixture with a diffused shade is a practical starting point. It spreads comfortable light while keeping the fixture’s footprint modest. Small details matter.
Lighting designer Randall Whitehead is a useful professional reference for thinking about layered, comfortable residential lighting. I can’t verify a verbatim statement from him about narrow-hallway sconces, so I won’t invent a quotation. The guidance here instead focuses on measurable choices: fixture depth, mounting height, light direction, brightness, and spacing. A shallow up-and-down sconce may draw the eye along a low ceiling, while a shaded, forward-facing fixture can soften a blank wall. The best option depends on the hallway’s width, ceiling height, and nearby door swings. Measure before you buy.
This guide’s five tips will help you compare styles and avoid common fit problems. Check the fixture’s projection against the clear walking space. Notice whether its shade hides the bulb from a standing view. Consider how the light looks on paint, trim, and framed photos at night. A warm glow often feels inviting, but too little light can leave corners murky. There is no universal winner. Even a carefully chosen sconce can disappoint if it sits too high or shines directly into someone’s eyes. That part is easy to overlook.
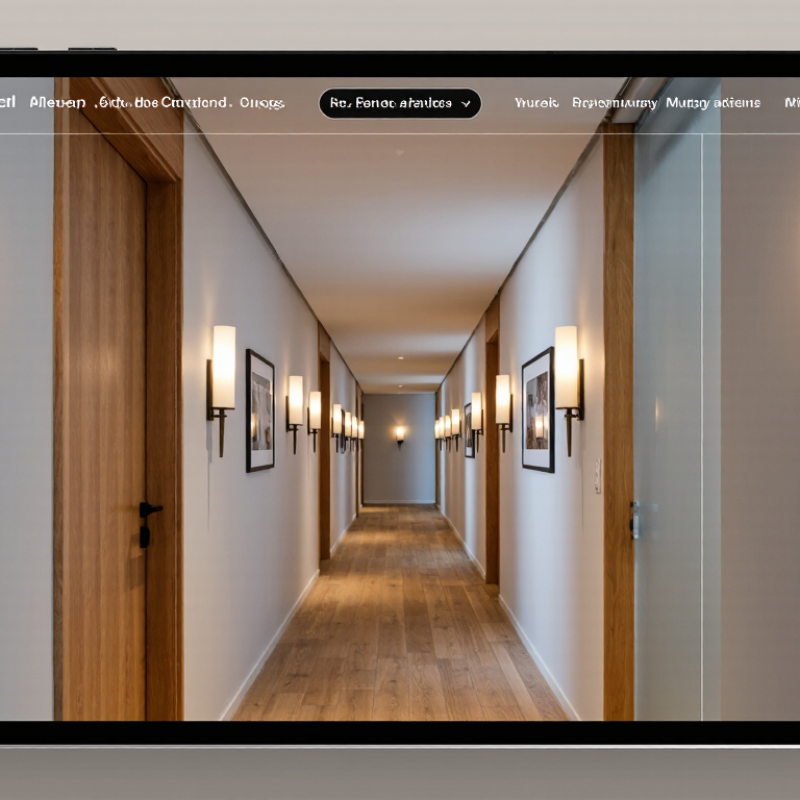
Assess the Hallway’s Width, Length, and Existing Light
Measure the hallway at its narrowest point, including trim, door handles, and any cabinets that project into the path. A sconce can look compact on a product page yet feel intrusive when someone carries a laundry basket past it. Note the available wall depth and keep the fixture clear of shoulders and swinging doors. Small details matter.
Next, consider the hall’s length and where people need light. One fixture near the entrance may leave the far end dim, while several bright sconces can create glare along a short corridor. Mark possible mounting points with painter’s tape, then view them from both ends. The tape test is simple, but it can reveal awkward spacing before installation. Exact spacing depends on fixture output, ceiling height, and wall color, so avoid relying on a fixed rule alone.
Existing light changes the choice, too. Check whether a ceiling fixture already brightens the center, or whether a mirror and pale walls bounce light around. If the corridor has dark corners, choose sconces that spread light broadly rather than only downward. Warm, diffused light often feels gentler at night. Not always. A dimmer can help balance sconce light with overhead lighting, though compatibility should be checked before buying. Revisit the hallway after dusk; daylight can hide uneven patches.
Compare Sconce Styles and Their Projection from the Wall
In a narrow hallway, a sconce’s style matters less than how far it reaches into the walking space. A slim, close-to-wall fixture usually keeps shoulders and bags clear. Its projection is the distance from the finished wall to the fixture’s outermost point, not just the depth of its backplate. Check the full dimension in the product specifications. Small detail, big difference.
A compact up-and-down sconce can spread light along the wall while keeping its body relatively shallow. A fabric or glass shade may soften the glow, but the shade can extend farther than the mounting plate suggests. Swing-arm designs offer adjustable reading light, yet their arms can become awkward obstacles in a tight passage. Measure with the arm in its widest position. Then compare that measurement with the hallway’s usable width.
Before choosing a style, mark the fixture’s maximum projection on the wall with painter’s tape. Walk past it carrying a laundry basket or shoulder bag; the test can reveal an issue that a floor plan misses. Also consider the light’s direction: upward light can make a low ceiling feel brighter, while a forward-facing shade may cause glare at eye level. There is no perfect option. A very shallow fixture may look neat but provide less spread, so check the beam and bulb guidance as well as the depth.
5 Tips for Choosing the Best Sconce Type for a Narrow Hallway - Compare Sconce Styles and Their Projection from the Wall
| Sconce style |
Typical wall projection |
Light distribution |
Narrow-hallway suitability |
Selection tip |
| Low-profile flush sconce |
About 3–5 in (8–13 cm) |
Usually diffused light through a shade or front panel |
Excellent where walking clearance is the priority |
Tip 1: Choose a shallow body and a diffused lens to limit glare at close viewing distances. |
| Compact up-and-down cylinder |
About 3–5 in (8–13 cm) |
Light is directed upward and downward, depending on the design |
Very good for a slim, uncluttered profile |
Tip 2: Check that the beam does not create harsh bright spots or unwanted light near doorways. |
| Small globe sconce |
About 5–8 in (13–20 cm) |
Broad, often soft light from a spherical diffuser |
Good if its widest point does not intrude into the walkway |
Tip 3: Compare the globe’s full diameter and projection, not just the mounting plate size. |
| Slim shaded sconce |
About 6–9 in (15–23 cm) |
Light is softened and directed by the shade; output varies by shade material |
Suitable when the shade is narrow and positioned clear of the traffic path |
Tip 4: Prefer a compact shade and check its outer edge against nearby trim, doors, and artwork. |
| Swing-arm sconce |
About 8–14 in (20–36 cm) when extended; varies by arm position |
Adjustable; can direct light toward a wall, artwork, or reading area |
Use selectively; the arm can project into the passage |
Tip 5: Confirm the maximum projection and ensure the arm can be secured in a position outside the walking route. |
Projection figures are approximate ranges for common fixture forms, measured from the wall surface to the fixture’s outermost point. Actual dimensions vary by design; always check the product specification and available hallway clearance before installation.
Select a Suitable Mounting Height and Spacing
Set the sconce center about 60–66 inches above the finished floor, then adjust for ceiling height and the fixture’s shape. This keeps light near eye level without placing the shade directly beside a face. In a very narrow hall, choose a compact fixture and check its projection before drilling. A mock-up helps. Tape its outline to the wall and walk past it with a bag or coat.
Space fixtures according to their beam spread, not just a fixed rule. A 6–8-foot starting interval can work for many sconces, but compare the light pools at night and look for dark gaps. The IES Lighting Handbook treats illuminance and uniformity as key design considerations, rather than prescribing one spacing for every fixture. As a clearance benchmark, the 2010 ADA Standards for Accessible Design limit wall-mounted objects between 27 and 80 inches high to 4 inches of projection into circulation paths. Check the actual hallway width, too.
Tip: Mark the proposed height and spacing with painter’s tape. Stand at both ends. A symmetrical layout may still feel crowded—or leave one patch oddly dim. Revise it.
Choose Light Output and Color Temperature for the Space
For a narrow hallway, choose light output by the light reaching the floor and walls, not by bulb wattage alone. The Illuminating Engineering Society’s Lighting Handbook gives about 5 footcandles, or 54 lux, as a maintained illuminance benchmark for circulation areas; actual needs vary with wall color, ceiling height, and users’ vision. Treat it as a starting point, not a prescription. A pair of modest sconces can create more even light than one bright fixture. Frosted shades help soften glare on close walls. A dimmer is useful, too.
Color temperature changes how that light feels. The U.S. Department of Energy’s LED lighting guidance classifies warm white as roughly 2700–3000 kelvin and cool white as roughly 3500–4100 kelvin. For a home hallway, 2700–3000K usually keeps painted walls and wood trim from feeling stark. Keep it warm. Check the bulb’s color-rendering index as well; DOE guidance notes that higher CRI generally means colors appear more natural. Test the actual fixture after dark, since wall paint can shift the look. I’d avoid mixing visibly different color temperatures along one short corridor, though matching every lamp perfectly can be fussy. A small inconsistency may matter less than harsh glare.
Check Installation Needs, Energy Use, and Safety
Before choosing a sconce, check what the hallway can support. A hardwired fixture needs a suitable electrical box and secure mounting; moving wiring may require a qualified electrician. A plug-in model can avoid new wiring, but its cord must not cross a walking path. Measure the fixture’s projection, too. In a tight corridor, even a few extra inches can catch a shoulder or bag. Small detail, big difference. Confirm the installation height and spacing against the fixture instructions, then test the layout with paper cutouts on the wall. It can feel a little fussy, but guessing is worse.
Energy use and safety matter every day. Look for an efficient LED fixture with a light output suited to the hallway, rather than choosing by wattage alone. Warm or neutral light often makes a narrow space feel more comfortable, while a dimmer can reduce glare at night if the fixture supports one. Check that bulbs and drivers are replaceable or serviceable. Inspect the fixture’s heat limits and required clearance from curtains, coats, and shelves. If the hall is near a bathroom or entry exposed to moisture, verify that the fixture is rated for those conditions. Follow the manufacturer’s instructions and applicable local electrical requirements. A low-profile shade may seem less dramatic, but it is often safer where people pass close by. I’d still mock up the beam pattern; wall color can change how bright it feels.
Conclusion
Choosing the right sconce for a narrow hallway starts with understanding the space. Measure its width and length, note ceiling height, and consider how much natural or existing light it receives. What type of sconce is best for a narrow hallway? A compact fixture with a shallow profile is often a practical choice because it provides useful light without projecting too far into the walkway. Compare styles and shades to find one that directs light where it is needed while keeping the passage comfortable and uncluttered.
Plan the mounting height and spacing so the light is distributed evenly, then choose an output and color temperature that suit the hallway’s size and feel. Before installing, check whether the fixture fits the available wiring and mounting points, and consider energy use and safety. A thoughtful balance of scale, placement, brightness, and installation needs can make a narrow hallway feel brighter and easier to navigate.

 Glow Light